
Introduction
Microsoft Azure is the leading cloud infrastructure platform. You implement database solutions on both on-premises and cloud servers. In the cloud, you can use Amazon Web Services (AWS), Azure, Google Cloud, or any other private cloud. Being a SQL Server DBA, you should be familiar with various Microsoft offerings for SQL Server.
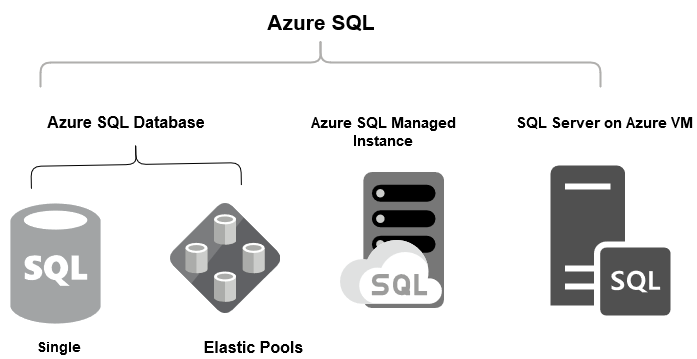
Azure SQL provides the following products for the SQL Server database engine.
- Azure SQL Database
- Azure SQL Managed instance
- SQL Server on Azure VM: It is similar to running SQL Server on an on-premises virtual machine (VM).
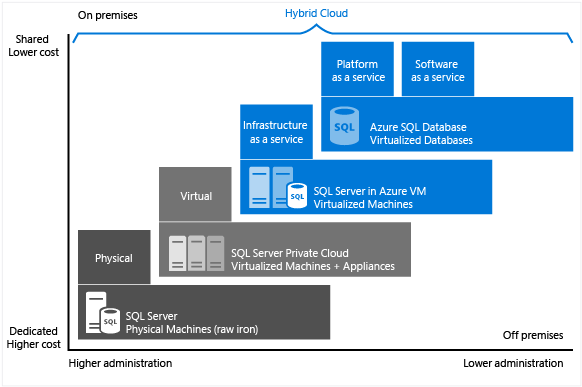
In the below Microsoft docs image, we get a comparison for the costs and administration tasks of on-premises and cloud databases.
Azure SQL database
Azure Database offers a platform as a service (PAAS) or relational database-as-a-service (DBaaS) in Microsoft Azure. It provides the latest stable edition for the fully managed database engine service.
It has the following deployment options for the Azure SQL Database.
Azure single database
It is a standalone managed database, and it has its dedicated resources. It is similar to a contained database in SQL Server. It is best suited for applications that require dedicated resources, database scoped developments.
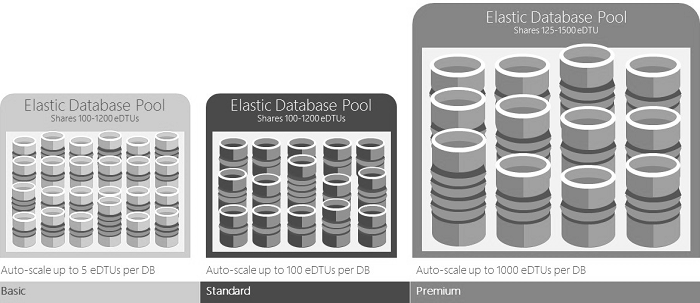
Elastic pools
It is a collection of databases and provides a cost-effective solution for managing multiple databases. The database can move in and out from the elastic pools. It is suitable for Saas applications that shared multiple databases and share costs for cost efficiency. Refer to the article, Elastic pools for more details.
Microsoft Azure SQL Database Hands-on
The initial steps have been skipped which include creating an Azure account and logging in. This section begins with creating a database and writing simple queries in the portal, and then it will talk about how to create a new database and a table with values and how to do some operations on the data using Microsoft Server SQL Management.
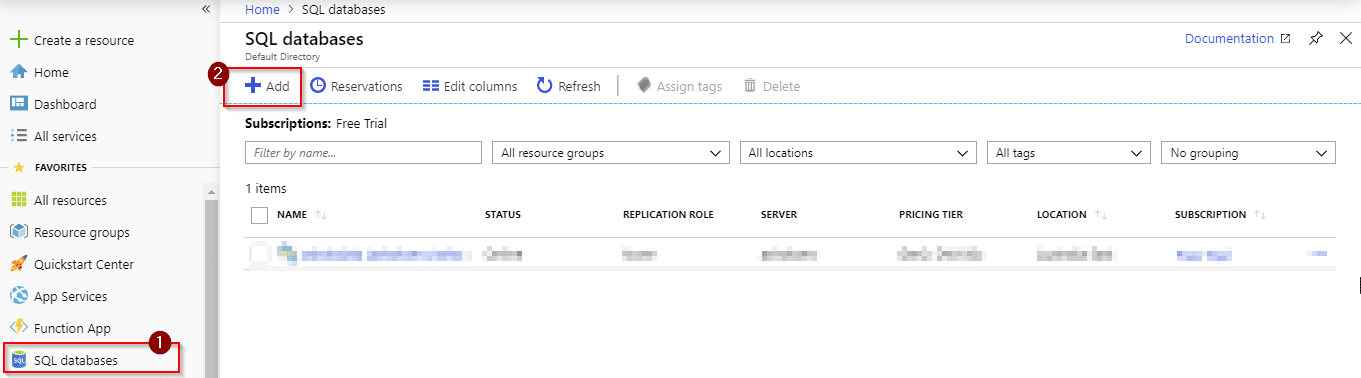
Step 1: Login to the portal first and search for Database under services
1. Select SQL Databases under Database service
2. Select Add to create a new database
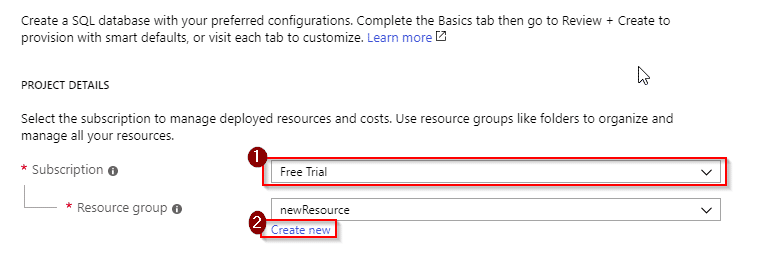
Step 2: You will see the following options on your screen where you will have to choose the type of subscription and resource group
1. If your account is on the free trial, please select Free Trial under Subscription
2. If you do not have any Resource group created, click on Create new
 Check out the SQL interview questions and answers to prepare for your next interview.
Step 3: To create a new resource, you have to name it. Here, the resource group is named as MynewResource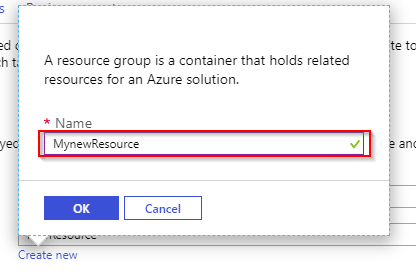
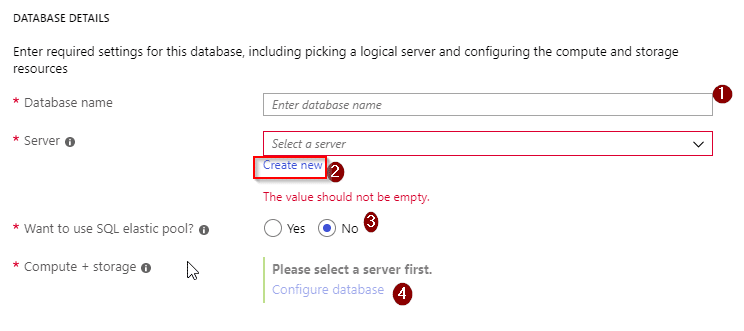
Step 4: Once you have created your resource group, you will now have to fill in some details
1. You will have to name your database. Here, it is named as myDatabase
2. After naming your database, you will have to create a server. Once you click on Create new, you will be prompted to set up some details, which will be explained in Step 5. Once done, close the pop-up window and continue with further steps
3. You will not need the elastic pool and, hence, select No
4. Once you are done creating a server, you will be able to click on the Configure database, where you will have to select pricing options
Step 5:
Enter a server name as your wish. Here, the name is helloworld1
1. Enter the username as per your choice
2. Enter a strong password containing uppercase alphabets, special characters, and numbers
3. Confirm your password by re-entering it
4. Select the location of your server. Southeast Asia has been selected here
5. Tick the box for Azure Services to access the server
6. Click on Select and close the window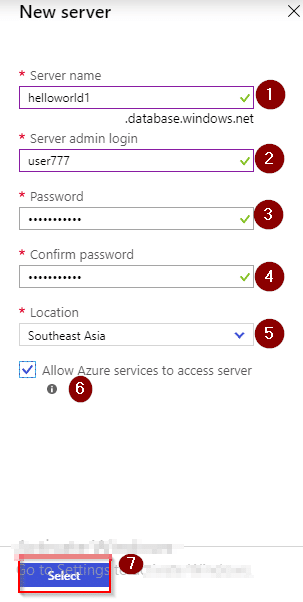
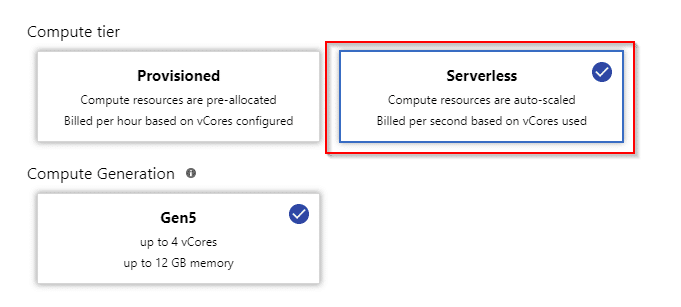
Step 6: After completing Step 5, go to the 4th point of Step 4 for pricing and storage options. You will be redirected to where you can configure it according to your convenience. Select vCore as shown below: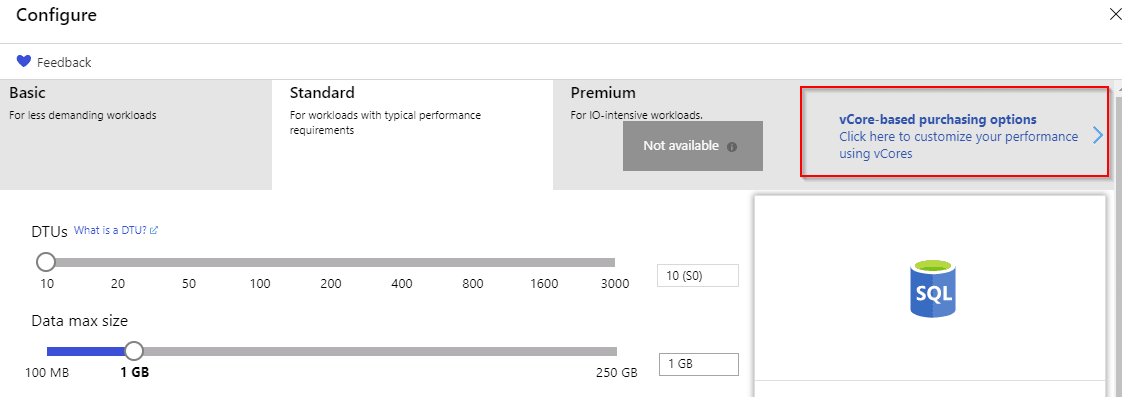
Step 7: After selecting vCore, you can see options like Compute tier which has two options. Select Serverless and you can select the size of your data from 1 GB to 512 GB. Here, it is kept at the minimum level, 1 GB, and it will cost Rs.11.86 from Rs.13,300 credits which you get for a free account.
Basic DTU
The Basic DTU provides, 5 units of fixed DTUs and a maximum of 2 GB is of storage is provided for 5 USD for a month. Though this is named as basic, this DTU can provide many more options. While it provides 99.9% availability and this configuration will retain database backup for 7 days. On the negative side, this configuration will not provide the options for column store indexing and In-Memory OLTP.
Standard DTU
In the standard DTU configuration, you have the option of configuring the number of DTUs.
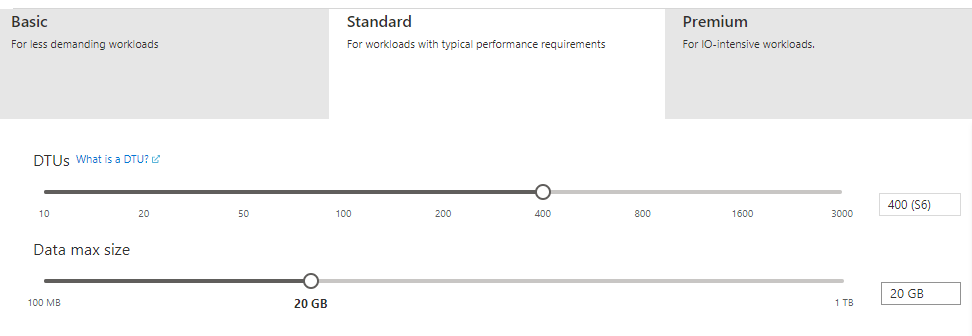
As shown in the above figure, the DTU configuration ranges from 10 to 3,000 while storage ranges from 100 MB to 1 TB. Each DTU is 1.5 USD, so you can choose the required DTU depending on your budget.
Unlike Basic DTU, in this configuration, backup retention will be 35 days compared to 7 days in Basic DTU. While you cannot create an in-Memory OLTP database, you can create column store indexes for this configuration with more the 100 DTUs.
Premium DTU
Premium DTU configuration in Azure SQL Database has more features than the other two configurations.
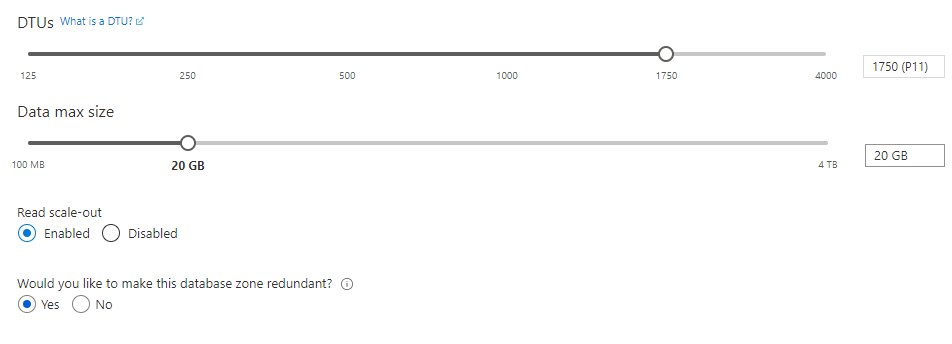
In this configuration, DTU can be configured from 125 to 4,000. In this configuration, DTUs up to 1,000 is priced as 3.72 USD per DTU while DTU more than 1750 is priced at 4 USD per DTU. In this configuration, you can configure data to a maximum of 4 TB depending on the selected DTU. Apart from these standard configurations, two other configurations were not available previously. Read scale-out option provides the scale-out option while the database zone redundant option provides enhanced availability by spreading replicas across availability zones within one region.
In the Premium DTU option, you have the option of creating column store indexes while in-memory OLTP is supported. In this configuration, 25 IOPS per DTU while is 1-4 in other configurations. This shows that the Premium DTU is the most suitable for heavy workloads. However, it has a much higher cost than the other two DTU options.
Similarly, you can configure the Azure SQL Database with v-core options. In this configuration, you need to provide the number of v-cores, database size with log files as well.
Now the question is what you select. Obviously, it will depend on the workload that you will be working with. However, it is always better to choose lesser configurations first and move ahead as and when needed. Since you can monitor the usage of the database in the Azure Portal, you can get an understating of the resource configurations.
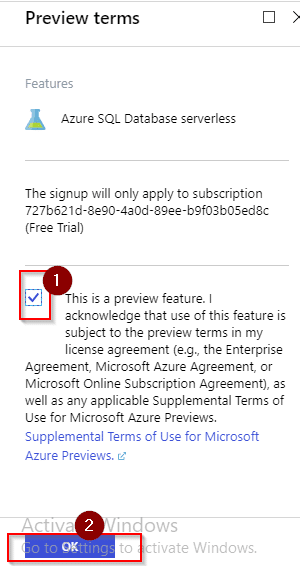
After configuring your settings, click on preview under Preview Terms.
1. Tick the box
2. Select OK

Step 8: Your changes will be saved, and you will be redirected to the screen with options as in Step 4, but with all the details filled in. Select Next: Additional settings > which is at the bottom and do the following steps:
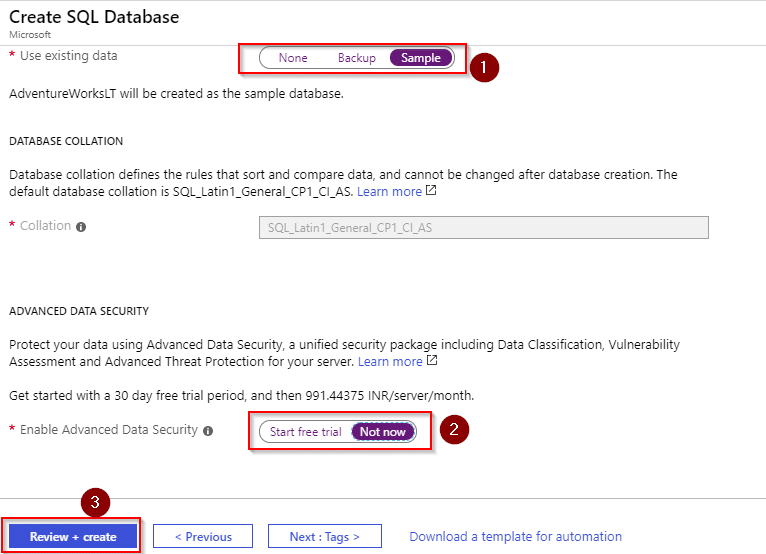
1. Under Use existing data, select Sample because you will be working with the sample data that is already present (and will create your own later)
2. Select Not now to enable ADVANCED DATA SECURITY
3. Click on Review + create
You can see a pop-up that has your configurations and select Create. Wait for some time as it takes a little long for deployment.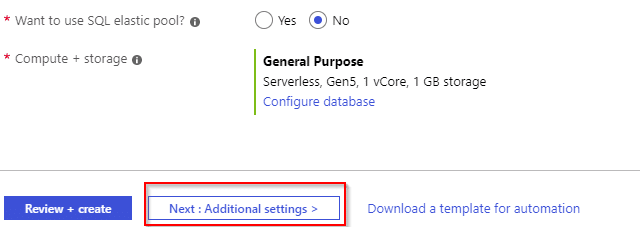

Step 9: Once done with the deployment, when you go to SQL Databases, you can see your database that has been created. Select your database and do the next step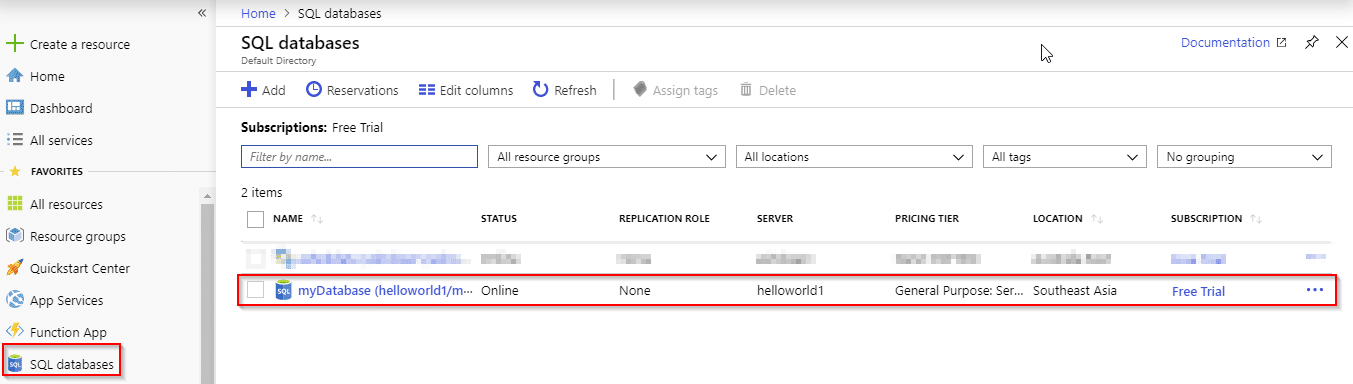
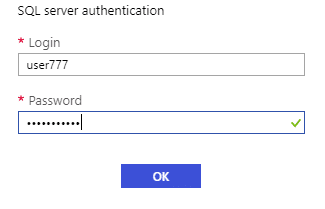
Step 10: Now that you have your database created, write a query on your data. Click on Query editor, and you will be prompted to give your log-in details that you set in Step 5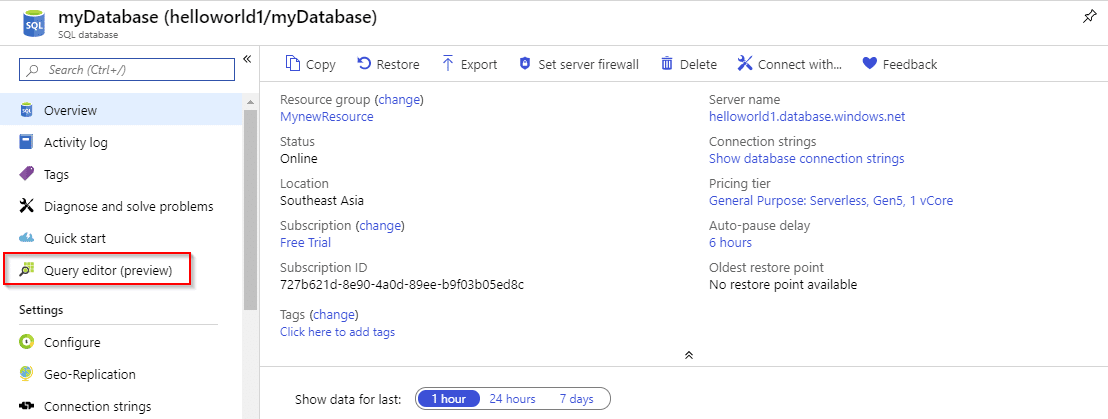
Step 11: After you login with the right credentials, you can see the database name on the left, expanding which you can see the option Tables
1. Expand Tables to see the tables in your database
2. Expand the table SalesLT.Customer, for example, to see the columns, so that you can write a query

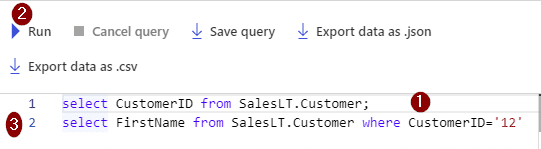
Step 12: Let us write a query on the designated area now.
1. Here, the first query is to print the CustomerID from the SalesLT.Customer table.
2. To execute the query, click on Run. You can see your result below
3. Note down one CustomerID, for example 12, and write another query to print the first name of the customer with the ID 12.
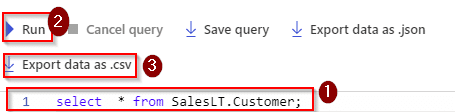
You can see the result after it gets executed. But you won’t be able to view a full-size table.
1. To see the entire table, use this: Select * from SalesLT.Customer;
2. Run the command
3. Select the option Export data as .CSV which is present right above the query window
Here is the data of the table in an Excel sheet.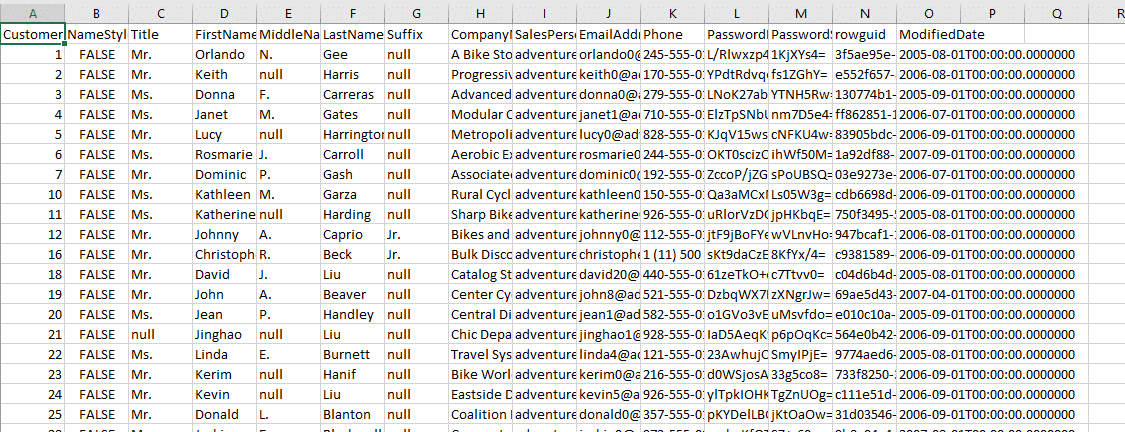
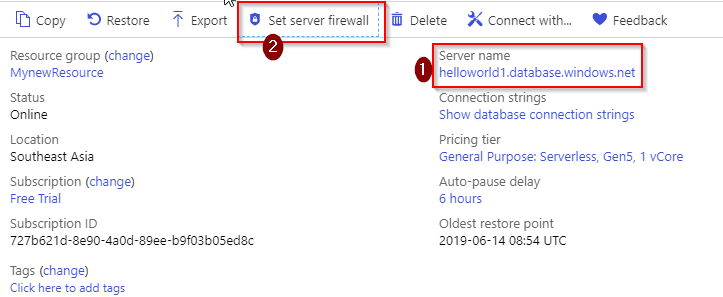
Step 13: Now set some security on your database. To do that, select your database from the SQL Databases list and do the following:
1. Copy your server name for future reference
2. Click on the Set server firewall
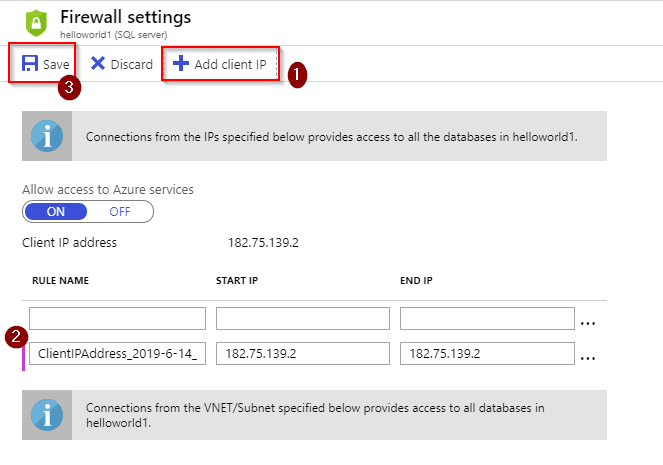
Step 14:
1. Click on Add client IP
2. You can see the details once you do the first step
3. Save the configuration
Step 15: Now create your own table using Microsoft SQL Server Management.
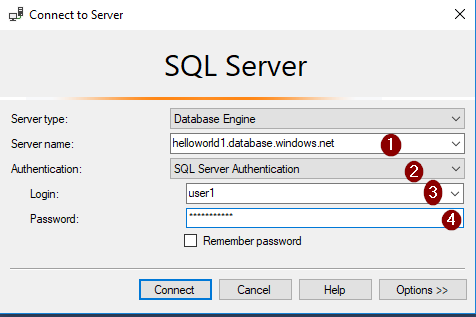
Once you have installed the software, you have to connect it to your server. For doing that, open the application and you will see a pop-up asking you to enter credentials.
1. Enter the server name that you copied and kept earlier
2. Under the Authentication drop-down menu, select SQL Server Authentication
3. Enter the username that you specified in the portal
4. Enter the correct password and select Connect
Step 16: After getting connected, you can see your server name on the left-hand side. Right-click on the name of your server and select New Query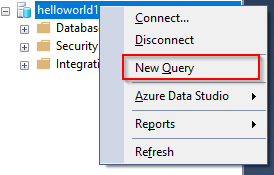
Step 17: Now write a query to create a new database on your server.
You can see the center screen which is meant for writing queries. To execute it, select Execute which is above the editor. Once your query gets executed, you can see your new database name on the left bar. In this case, the new database is new1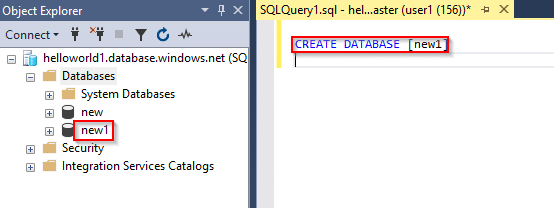
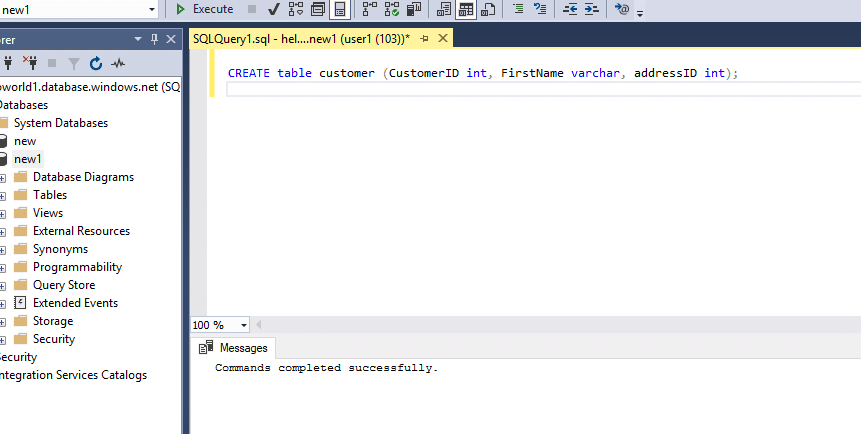
Step 18: Let us now create a table inside your database. Let us create a simple table with the name ‘customer’ with columns customerID, first name, and address. You can see the results below the editor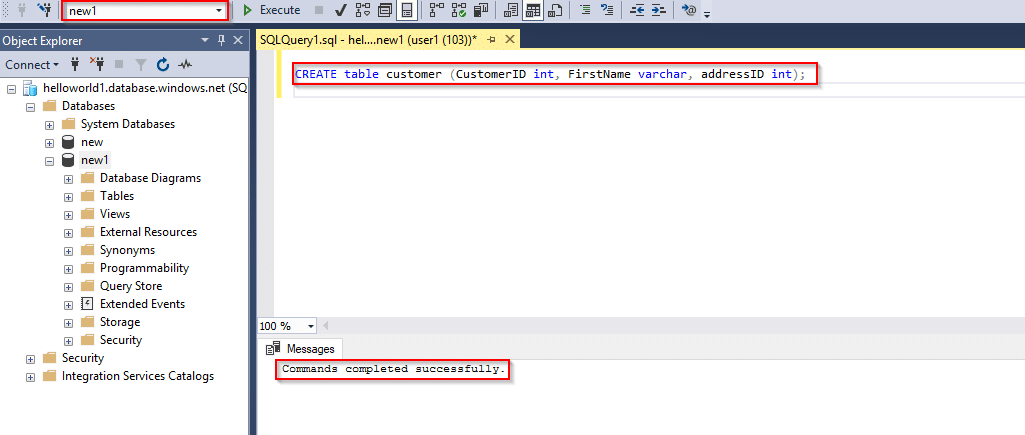
Step 19: When you expand your database, you can see the table that you have created. And, expand the table to see the columns
A table without entries does not look good. So, let us insert a row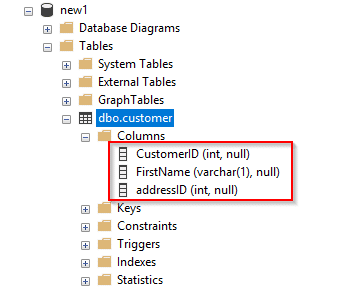
Step 20: Now that you have one entry, you can write some queries on it. As did in the portal, let us print the first name of the customer whose ID is 1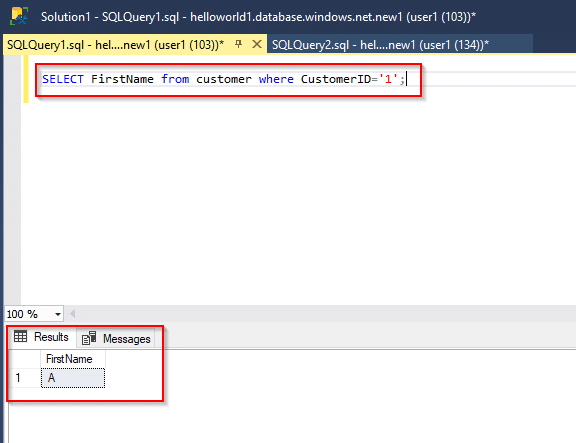
Step 21: If you want to add more data and write queries, please go ahead.
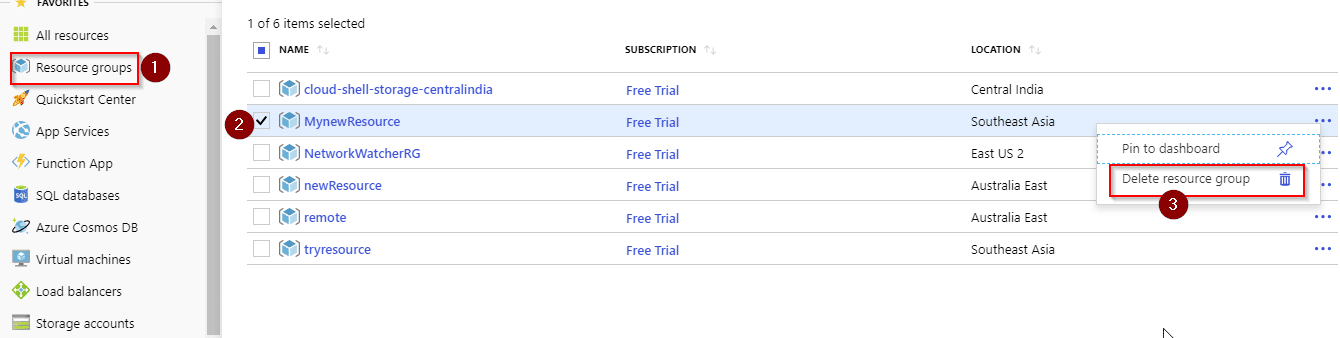
But make sure that before logging out you delete your resources to save credits
1. Go to Resource groups
2. Select your resource group
3. Select Delete by clicking on the three dots
You will have to re-enter the name of your resource group to confirm the deletion.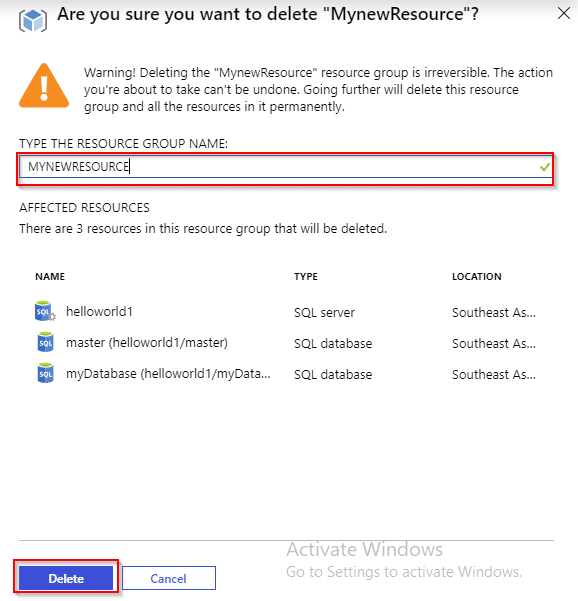
With this, you have reached the end of this blog, and hopefully, you know by now how to work with Microsoft SQL Azure Database.
No comments:
Post a Comment
Thanks for your valuable comment...........
Md. Mominul Islam